How To Make Videos With VEED
Learn how to make professional videos with VEED in 10 minutes. Complete beginner’s guide covering setup, editing, AI features, and export. No experience needed.


On this page
- What Is VEED and Why It’s Perfect for Beginners
- Why VEED Beats Other Online Editors
- Who Should Use VEED
- Getting Started: Account Setup and Interface
- Creating Your First Video: Step-by-Step
- Essential VEED Features Every Beginner Should Know
- Background Removal
- Eye Contact Correction
- Voice Translation and Dubbing
- Advanced Features for Better Videos
- Collaboration Tools
- Creating Different Types of Videos
- Direct Sharing Options
- Optimization Tips
- VEED Pricing: Which Plan Should You Choose?
- Troubleshooting Common Issues
- Pro Tips for Better VEED Videos
- Quality Improvements
- Conclusion
Making videos used to mean expensive software and a steep learning curve. Not anymore.
VEED changed the game by putting professional video editing in your browser—no downloads, no complexity.
I’ve tested dozens of online editors, and VEED is the only one that actually works like it promises.
In the next 10 minutes, you’ll go from complete beginner to creating polished videos that look like you hired a pro.
ALSO READ: Ultimate Beginner’s Guide to Veo 3 (Tutorial)

What Is VEED and Why It’s Perfect for Beginners
VEED is an online video editor that runs entirely in your browser. No software to install, no huge files to download, no crashes to worry about.
But here’s what makes it special: VEED combines the power of professional editing tools with AI features that do the heavy lifting for you.
Auto-subtitles that actually work, background removal with one click, and Magic Cut that turns your rambling footage into snappy content.
Why VEED Beats Other Online Editors
- Actually Works: Unlike most browser-based editors, VEED doesn’t crash when you upload a 10-minute video.
- AI-Powered: Auto-subtitles, voice translation, and smart editing features that save hours of manual work.
- No Learning Curve: If you can use Google Docs, you can use VEED. The interface makes sense from day one.
- All-in-One: Recording, editing, and sharing in one platform. No juggling between different tools.
- Real Collaboration: Multiple people can work on the same project without version control nightmares.
Who Should Use VEED
- Content creators who need to pump out videos fast
- Small businesses creating marketing content without agencies
- Educators making course materials and tutorials
- Social media managers handling multiple platforms
- Anyone who wants professional results without professional complexity
Getting Started: Account Setup and Interface
Step 1: Create Your Account
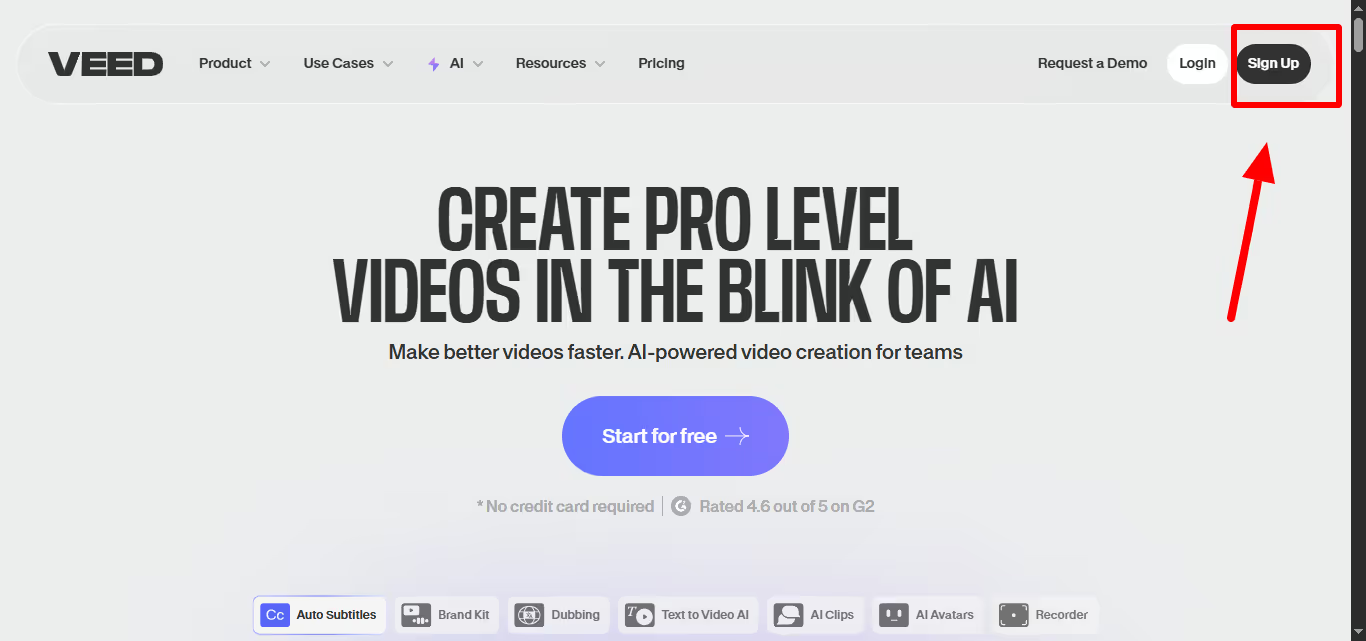
- Go to veed.io
- Click “Sign Up” (top right corner)
- Use your email or sign up with Google/Facebook
- Choose your plan (start with Free to test it out)
Free Plan Includes:
- Basic editing tools (trim, cut, merge)
- 720p exports with watermark
- 30 minutes of auto-subtitles monthly
- 10-minute video length limit
- Access to stock library (limited)
Step 2: Understanding the Dashboard
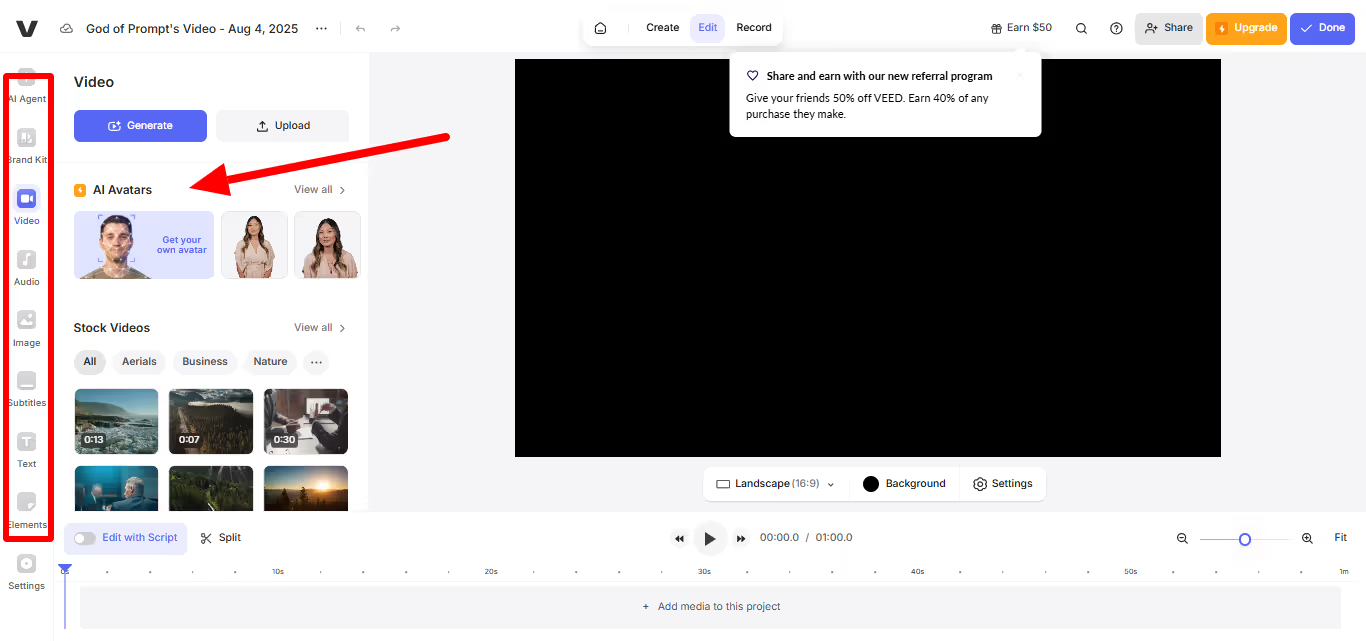
Once you’re in, you’ll see:
- Create Project” Button: Your starting point for new videos
- Recent Projects: Quick access to your work
- Templates: Pre-made video formats for different use cases
- Stock Library: Royalty-free videos, images, and audio
Step 3: The Editor Interface
When you start a new project, you’ll see:
- Canvas: Your video preview (center of screen)
- Timeline: Where you arrange clips (bottom)
- Tools Panel: Editing options (left sidebar)
- Properties: Settings for selected elements (right sidebar)
The layout is intuitive—if you’ve used any Google product, this will feel familiar.
Creating Your First Video: Step-by-Step
Let’s make a simple social media video from scratch.
Step 1: Start Your Project
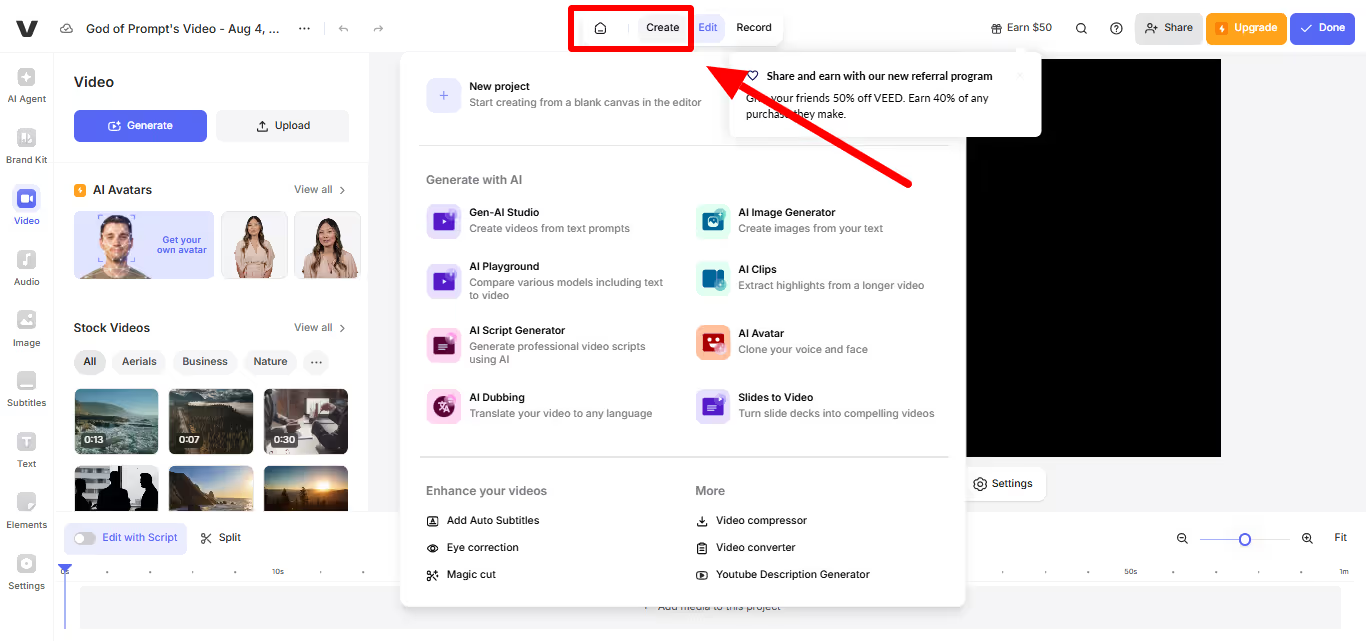
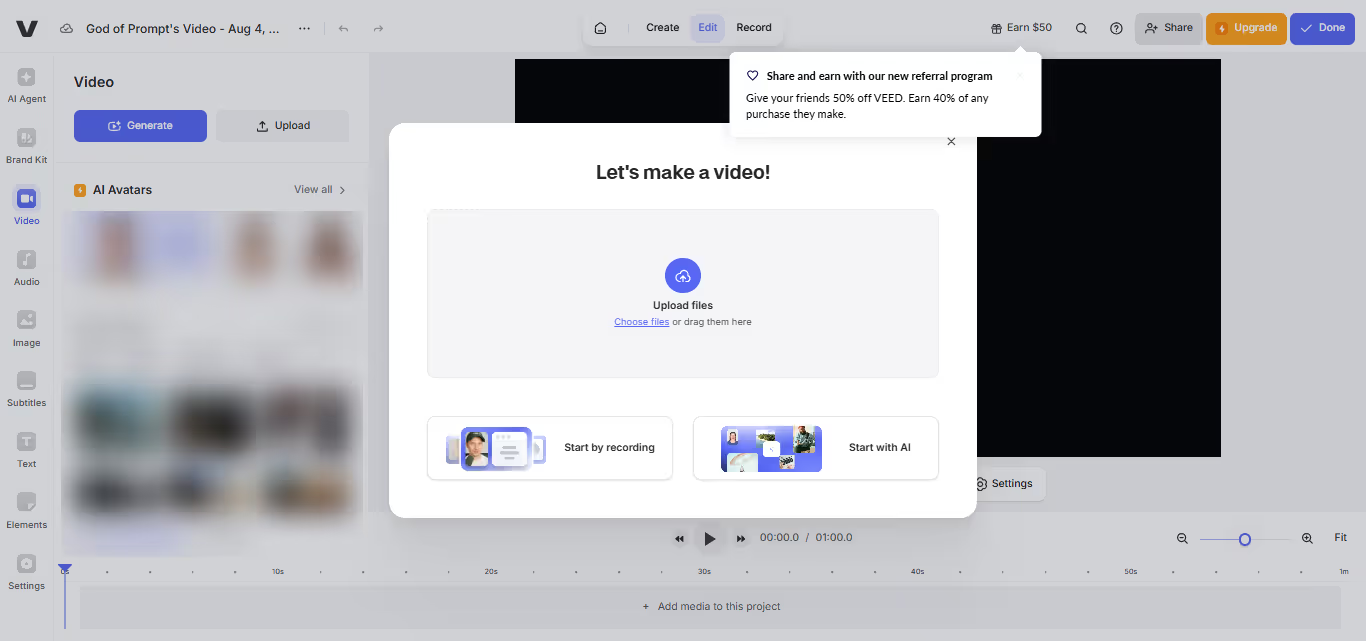
- Click “Create Project”
- Choose “Upload” to add your video file
Or select “Record” to capture your screen/webcam
Or pick a template if you want a head start
File Support: VEED accepts MP4, MOV, AVI, and most common formats. No need to convert beforehand.
Step 2: Upload and Arrange Your Content
Drag and drop your video file into the upload area. VEED processes it automatically—usually takes 30 seconds to 2 minutes depending on file size.
Once uploaded, your video appears in the timeline. You can:
Drag the edges to trim start/end points
Click and drag to move the clip position
Right-click for additional options
Step 3: Basic Editing Essentials
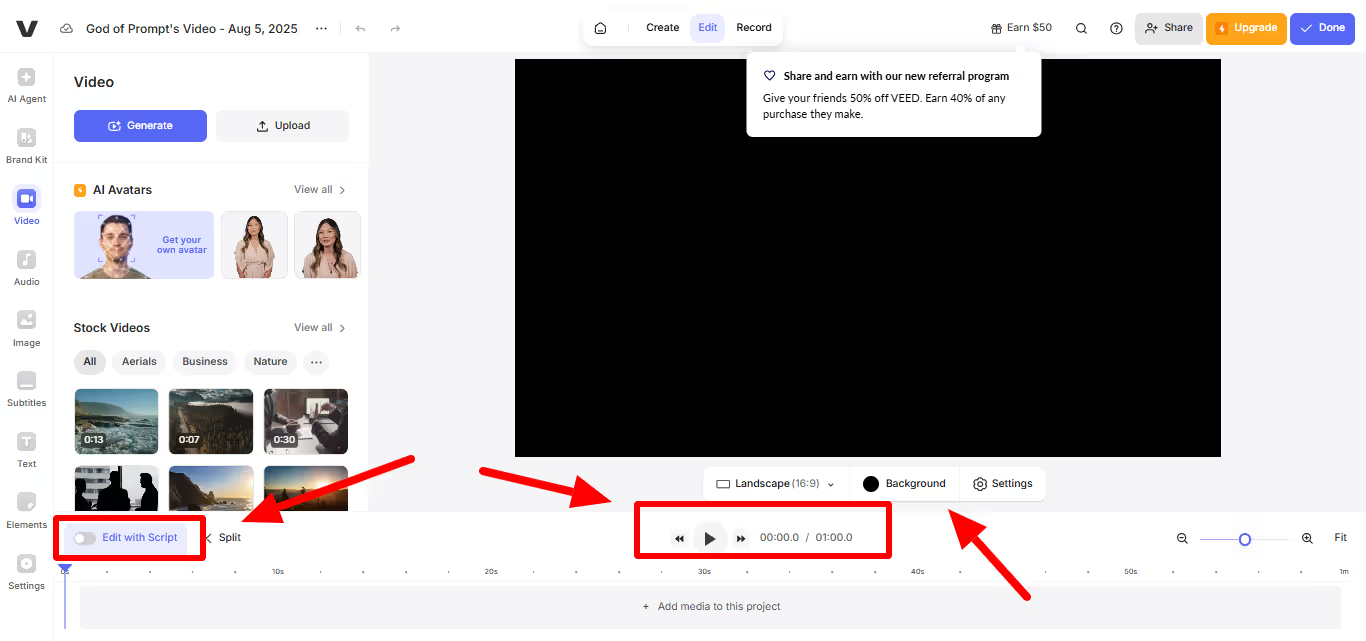
- Trimming: Click the clip, then drag the edges to cut unwanted parts
- Splitting: Place the playhead where you want to cut, then click the scissors icon
- Deleting: Select unwanted sections and hit the delete key
Pro Tip: Use the spacebar to play/pause. Makes editing much faster.
Step 4: Add Text and Titles
- Click “Text” in the left panel
- Choose a style (or start with basic)
- Type your text
- Drag it to position on screen
- Adjust timing in the timeline
Text Options:
- Font styles and sizes
- Colors and outlines
- Animation effects
- Duration control
Step 5: Enhance with Audio
Adding Music:
- Click “Audio” in the left panel
- Browse the stock library or upload your own
- Drag to timeline below your video
- Adjust volume levels to balance with speech
Audio Controls:
Volume slider for perfect balance
Fade in/out effects
Audio cleanup tools
Voice enhancement options
Essential VEED Features Every Beginner Should Know
Auto-Subtitles (Game Changer)
This feature alone is worth the price of admission.
- Click “Subtitles” in the toolbar
- Select “Auto Generate”
- Choose your language
- Wait 2-3 minutes for processing
- Edit any mistakes inline
Why It’s Amazing: Subtitles boost engagement by 80% on social media. VEED’s accuracy is 95%+ for clear audio.
Magic Cut (Your New Best Friend)
Magic Cut automatically removes awkward pauses, “ums,” and dead space.
Select your video clip
Click “Magic Cut” in the toolbar
Let VEED analyze and cut automatically
Review and adjust if needed
Perfect For: Talking head videos, interviews, tutorials, or any content where you need to tighten pacing.
Background Removal
Remove or replace backgrounds without a green screen.
Click “Effects” → “Background Removal”
VEED automatically detects and removes background
Add solid color, image, or video as replacement
Fine-tune edges if needed
Use Cases: Product demos, talking head videos, creative content where location doesn’t matter.
Eye Contact Correction
Makes it look like you’re staring directly at the camera, even when you’re reading from a script.
Apply to any talking head clip
VEED automatically adjusts your eye direction
Creates more engaging, professional-looking content
Voice Translation and Dubbing
Translate your video’s audio into 50+ languages while keeping your voice.
- Select your video
- Choose “Translate” from audio tools
- Pick target language
- VEED creates new audio track in chosen language
Advanced Features for Better Videos
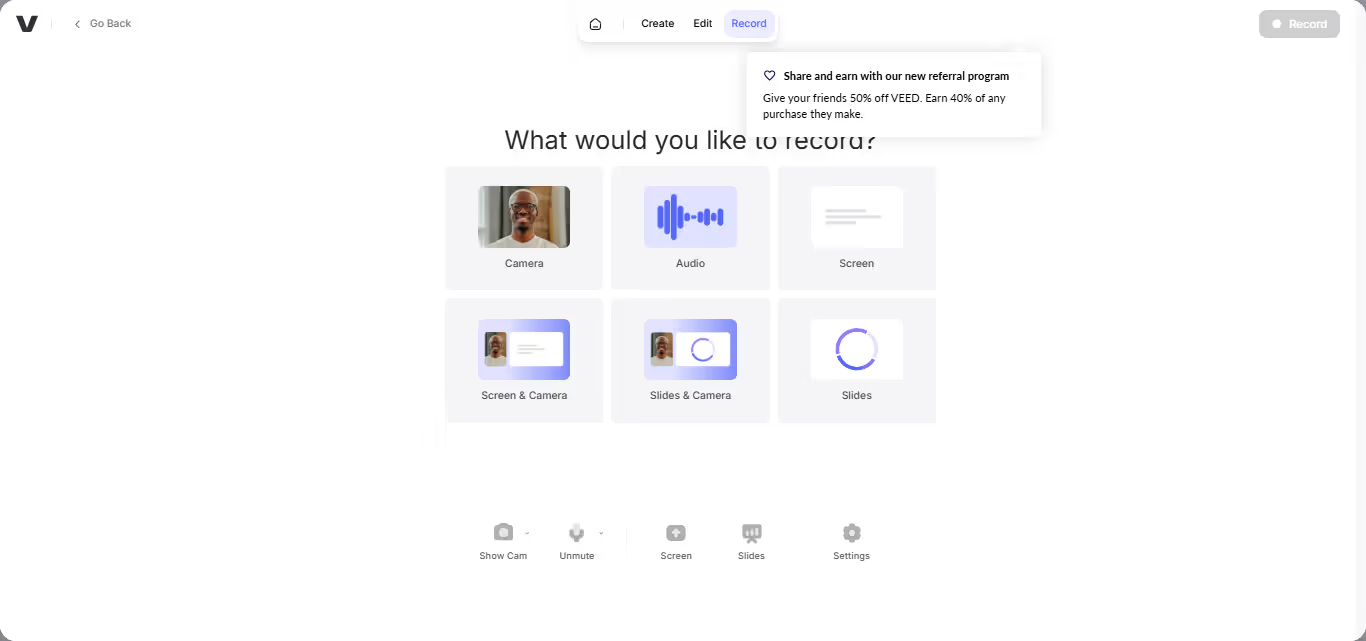
Screen Recording
Create tutorials, software demos, or presentations directly in VEED.
Setup:
Click “Record” → “Screen”
Choose recording area (full screen, window, or browser tab)
Enable microphone for voiceover
Hit record and start demonstrating
Recording Tips:
- Clear desktop of distractions
- Close unnecessary applications
- Speak clearly and at steady pack
- Plan your workflow beforehand
Brand Kit (Pro Feature)
Keep all your videos on-brand with consistent colors, fonts, and logos.
Setup:
- Go to Brand Kit in settings
- Upload your logo
- Set brand colors
- Choose default fonts
- Save templates for quick reuse
Collaboration Tools
Work with team members on the same project.
How It Works:
- Click “Share” on any project
- Invite team members by email
- Set permissions (view, comment, edit)
- Track changes and feedback in real-time
Creating Different Types of Videos
Social Media Videos
TikTok/Instagram Reels:
- Use 9:16 aspect ratio
- Keep videos under 60 seconds
- Add trending music from stock library
- Use bold text overlays
- Include auto-subtitles
-
YouTube Content:
16:9 aspect ratio for standard videos
- Add intro/outro templates
- Include subscribe call-to-action
- Use thumbnail-friendly text styles
- Business Videos
-
Product Demos:
Screen recording for software
Close-up shots for physical products
Clear, step-by-step narration
Professional background music
Team Introductions:
Consistent background/lighting
- Name titles and job descriptions
- Upbeat background music
- Company branding elements
- Educational Content
Tutorial Videos:
Screen recording with webcam overlay
Step-by-step text instructions
- Highlighting important areas
- Clear, paced narration
- Exporting and Sharing Your Videos
- Export Settings
- Click “Export” (top right)
Choose quality:
720p: Good for social media, smaller file sizes
1080p: Standard HD, best balance of quality/size
4K: Maximum quality, large files
Select format (MP4 is usually best)
Wait for processing (1-5 minutes typically)
Direct Sharing Options
- Social Media: Post directly to Facebook, LinkedIn, Twitter
- Link Sharing: Get shareable link for email/messaging
- Embed Code: Add video to websites or blogs
- Download: Save file to your computer
Optimization Tips
For Social Media:
- Square (1:1) or vertical (9:16) formats
- Keep under 2 minutes for better engagement
- Add captions for sound-off viewing
For Business Use:
- 1080p minimum quality
- Professional thumbnails
- Clear audio levels
- Consistent branding
VEED Pricing: Which Plan Should You Choose?
Free Plan: Perfect for Testing
- Basic editing tools
- 720p exports with watermark
- 30 minutes subtitles/month
- 10-minute video limit
Best For: Trying VEED, simple personal projects, occasional use
Basic Plan: $9/month
- Removes watermark
- 1080p exports
- 720 minutes subtitles/month
- Longer video lengths
Best For: Regular content creators, small business owners, consistent video needs
Pro Plan: $24/month
- All Basic features
- 1440 minutes subtitles/month
- Subtitle translation
- Advanced AI features
- Priority support
Best For: Professional creators, agencies, teams with advanced needs
Business Plan:
- All Pro features
- 8000 minutes subtitles/month
- Custom templates
- Team collaboration
- Advanced analytics
Best For: Companies, large teams, enterprise-level video production
My Recommendation: Start with Free to learn the platform, upgrade to Basic when you need watermark removal, jump to Pro when AI features become essential.
Troubleshooting Common Issues
Video Won’t Upload
- Check file size (max varies by plan)
- Ensure supported format (MP4, MOV, AVI)
- Try different browser if issues persist
- Clear browser cache
Slow Processing
- Close other browser tabs
- Check internet connection
- Try uploading during off-peak hours
- Consider smaller file size
Audio Sync Issues
- Re-upload source file
- Check original video for sync problems
- Use VEED’s audio sync tools
- Contact support for persistent issues
Export Takes Forever
- Lower quality settings for faster processing
- Export during off-peak times
- Ensure stable internet connection
- Try different browser
Pro Tips for Better VEED Videos
Workflow Optimization
Plan Before Recording: Outline your content structure
Record in Segments: Easier to edit than one long take
Use Templates: Speed up recurring video types
Batch Similar Tasks: Do all text additions at once
Save Project Frequently: Auto-save isn’t perfect
Quality Improvements
Good Audio = Good Video: Invest in decent microphone
Lighting Matters: Face a window or use simple lighting setup
Stable Shots: Use tripod or stable surface for recording
Clear Speech: Speak slowly and clearly for better auto-subtitles
Efficiency Hacks
Keyboard Shortcuts: Spacebar (play/pause), Delete (remove selected)
Duplicate Successful Projects: Use as templates for similar content
Organize Assets: Keep frequently used elements in folders
Preview Often: Catch issues early in the editing process
Conclusion
VEED transforms video creation from a technical nightmare into something anyone can master.
The combination of intuitive design and powerful AI features means you can create professional-looking videos without the professional learning curve.
Start with the free plan to get comfortable with the interface, then upgrade when you need more features.
Focus on creating consistent, valuable content rather than getting lost in advanced features.
The most important thing? Start creating. VEED makes it easy to experiment, learn, and improve with every video you make.
Your audience is waiting for your content. VEED just removed your last excuse for not creating it.
Next step: turn this article into output with AI design prompts, or go deeper with Midjourney prompts.
Prompts for this topic
Put this article to work with ready-to-use prompts from the God of Prompt library.
Keep reading

How to Make AI Videos (Easy and Fast) — Sora, Veo 3, Midjourney & VEED
Learn how to create AI videos in minutes using Sora, Veo 3, Midjourney, and VEED. Step-by-step tips, tools, and tricks to make professional content—fast and easy.

8 Data Visualization AI Tools That Make Complex Information Actionable
Explore AI-powered visualization tools that convert complex data into actionable insights, enhancing decision-making across various business sectors.

10 AI Image Generation Mistakes 99% Of People Make And How To Fix Them
Avoid common AI image generation mistakes with clear prompts and techniques to improve your results and unleash your creativity.

The best of the blog, in your inbox
One email when notable prompts, tools, and model updates land. No spam, unsubscribe anytime.
Join 100,000+ subscribers. One email a week, real prompts, tools, and model updates. Unsubscribe anytime.